Powertec Power Rack System Review: Part 2 of 2

This article is the continuation of the Powertec Power Rack System Review.

After I left Fitness Nutrition with a 50.00$ deposit for the labour to take out the equipment out of inventory, I went home eagerly waiting for the next day to arrive so I could pickup the rack. Luckily for me, the day went by fairly quick. At around 7 PM, I greeted Nick (the guy who sold me the equipment) and we passed my credit card again for the full payment minus the deposit the day before. After the transaction had passed, I was instructed to bring my car around the back next to the loading bay. Once at the garage door, it was a game of Tetris to load up all the pieces into the vehicle. There were about 5 big boxes (2 for the rack, 2 for the lat-machine addon and 1 for the bench) with a 7″ Olympic bar and 2 tire mats for floor protection (the floor mats weigh a ton!). Everything fit in the car nicely, and before I knew it, I was the owner of a Powertec rack.

With a pleasant drive home, I backed up the car to my garage and started unloading the boxes. Piece by piece, I brought everything downstairs into the room where the equipment was going to be housed. Since I was tired that day, I told myself I would assemble the rack another time. Fast forwarding to a few days later, I got off my ass and started assembly of the rack. I noticed before the build that I was missing some tools (the socket ratchet out of all things…) so a quick trip to Canadian Tire lead me to some new Mastercraft sockets and wrenches.

I have to say it… the pieces that make up this rack are all solid, high quality stuff. Putting this whole thing together was a joy I must admit (I’m a assembly-fiend mind you… starting with Legos as a child). The whole rack, when assembled, was 82″ from top to bottom. My ceiling is 83 and 3/4″ high, so a problem was now apparent: the lat-machine add-on was not going to fit, as it took up another 2-3″ of height that I did not have. Actually, the problem was only during the installation phase of the rack, as I didn’t have any workable ceiling height to slide the two metal rods into place and tighten them at the top (besides this, the rack would have fit in 83.75″ of space without a problem). An “Uh oh” ran through my mind, shifting my mood altogether to anger. Not knowing what to do, I decided to sleep on the matter and let my mind do some thinking. I had several solutions come up the next day: 1) I could either try to assemble the lat system on the floor [didn’t work], 2) I could make a small rectangular cut in the ceiling for the installation [decided against it, even though parents were cool with it] and 3) move the gym system to another location [chosen solution]. At this point, I have no other room in the house where the rack can be housed. The only viable solution, which will only be available in two months, is when I clean up the garage and put the equipment in the back. Right now, there is a mountain of useless junk taking up valuable gym space. When spring rolls around, I will be doing some IKEA shopping and build some nice metal shelves around the garage to organize everything. Till then, I have decided to work without the lat equipment and simply stick to my original exercises (squat, dead-lift, power clean, bench press and shoulder press).

Regardless of the situation, the rack is excellent overall, except for one thing: the upper metal supports (which are a measly 4″ long) are just that… not long enough. I’m used to the 10″ long metal brackets at my ex-gym (Monster Gym) but I guess I’ll eventually adapt to them. Anyway, the Powertec rack is sturdy, well built and does not shake or rattle when handled. The Powertec Utility Bench is also well built, but I must say that I am not a fan of the side-adjusting lever/piston. I still haven’t tested the equipment mind you, as I don’t have any Olympic weights (picking them up soon). I guess a Part 3 of this review is needed. 🙂

Powertec Power Rack System Review: Part 1 of 2

I have been training at the Monster Gym here in the West Island for seven years now and been renewing my membership on a yearly basis. This year however, I will be ending the renewal as I am finally moving to a home gym setup. The main reasons behind this move is because of several factors. First, the total cost of a home gym setup is much cheaper than paying a yearly fee in the long run. I have been training at the Monster for 7 years now, and have been paying a fee ranging from 300 to 360$ CDN (student pricing to regular). While I have no complaints about this gym (it’s the BEST in Montreal, hands down) it does lead to my second concern: it’s overcrowded. Simply put, the gym has never been this packed before… it’s a friggin’ zoo! The squat racks, once empty, is now home to the bicep gurus and amateur lifters. The treadmills, elliptic and biking machines are constantly packed with no time slots available for the entire night. Quite simply, the whole gym experience has been tainted for me these past 2 months. A lot of these people are in for the holiday rush mind you, and should disappear within a month or two (three if they’re dedicated…). Regardless, I’ve had enough of the overpopulated facilities… it’s time to move on!

Shopping around for a home power rack was quite simple with friendly old Google. I found numerous brands and models with different price points. My search was most likely going to take a few days (if not weeks) to figure out the right model for me. It was until I came across the Powertec Power Rack System that really got my attention. There were a few sites advertising the item, but almost all of them were too expensive, high shipping costs or surprisingly out of stock. Reading some body building forums brought up to my attention that these units were pretty scarce, with backorders ranging from 1 to 2 months. I didn’t want to wait that long for a power rack, so I started looking at other brands such as the Body-Solid and Powerline units (same company mind you). A lot of online stores were carrying these brands with plenty of stock. I read that they’re pretty decent machines, but not as durable as the Powertec in terms of construction. They were also lacking the dip arms, something that was a standard on the Powertec rack. Anyway, I figured it wouldn’t be such a big deal… the Powerline rack was cheaper too. I was now considering saving on the shipping costs (around 200$) by simply driving down to Kingston (3 hour drive, one way) and pick the equipment up from a retailer. The next step was calling up the store, when I told myself I should try Fitness Depot down by the road from my house. I knew right away their prices on the equipment they had was outrageous, but for comparison reasons and to save some possible time, I visited them just in case. The brand they’re mostly known for is Northern Lights. I assumed the brand was good, since they’re so expensive and all. Anyway, checking out the squat rack and the bench that Fitness Depot was selling turned out to be a disaster: the squat rack was cheap and flimsy, and the bench was made out of hard foam rock or something because it was utterly uncomfortable to lie on. The quote for the whole system came up to 1,800$ which was totally not worth it, since the Powertec system was half that. Reading online reviews about the Northern Lights system was never positive; almost everyone had a complaint about them, from the hard rock bench to the flimsy chassis construction. So, with Fitness Depot out of the way, I was just about to call the Kingston store for the Powerline equipment when I decided to try one more time in finding another local fitness equipment store in the Montreal and Laval area… just one more try!

There and behold, I came across Fitness Nutrition, a fitness equipment and supplements store with 12 years of experience located in Laval. This place was literally 14 minutes away from my office! Without thinking twice, I got in my car the following morning and visited the place right before heading to work. A rather large and white building, this place is easy to find on St-Martin street. Upon stepping inside, I was greeted by a worker there who showed me the Powertec equipment right away. And what do you know, they had units in stock! Before I busted out the AeroGold to pay for the unit, I promptly asked for a quotation on the rack (with lat attachment), bench and bar. “Make me a deal” I told the worker. He nodded and proceeded to crunch some numbers down. This gave me an opportunity to go back to the power rack and observe the construction in greater detail. Simply, it felt damn solid and did not wobble whatsoever. The arms and supports were decent, but not the best I’ve seen (I can replace them if ever). The Powertec rack was quite superior to the Northern Lights garbage I had seen the other day. So, the final package prices with taxes in came up to 1,800$ CDN (utility bench, bar, rack and lat attachment). I thought this was a bit too high, but I didn’t say anything just yet. I thanked the worker and left with the quote and headed to work. At the office, I did some quick comparison with online prices and noticed it was 400$ more expensive without the shipping fees.

That night, before going home, I decided to stop by Fitness Nutrition and see if I can bring the total price down. I showed them the competitive website and they brought down the price by 220$ which was pretty decent considering they were taxes in. After weighing all my other options, I agreed to the final price: 1,715.00$ taxes in (with some 4×6′ mats thrown in too). Since it was closing time for them, I offered to pay a deposit and pick up the equipment the next day.

Part 2 of this article.

The American Psycho Facial Treatment

One of my favourite movies, American Psycho, portrays a serial killer who goes through a lengthy facial treatment each and every morning to revitalize himself. Upon searching Google for the list of products the main character uses, I came across an Amazon Guide that went to great detail on what exactly to purchase. I always wanted to try it out for myself to see what kind of benefits it would bring to one’s face, so I went ahead and ordered all the items on the page. After two weeks of usage, I noticed a more vibrant appearance in my facial features. My skin felt less coarse and a few girls actually noticed the change. 🙂 The non-alcoholic after-shave sure does feel good too.

Anyway, here’s the list of products for everyone’s benefit. I revised the products and added the out of stock / missing ones with the appropriate substitutes.

Patrick Bateman: I live in the American Gardens building on West 81st street. My name is Patrick Bateman. I’m 27 years old. I believe in taking care of myself, and a balanced diet and a rigorous exercise routine. In the morning, if my face is a little puffy, I’ll put on an ice pack while doing my stomach crunches. I can do a thousand now.

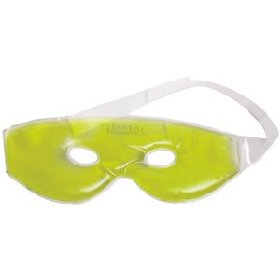
Fire & Ice Herbal Beauty Mask
Alternative: Cold/Hot Full Face Compress

After I remove the ice pack, I use a deep pore cleanser lotion.

Neutrogena Deep Clean Cream Cleanser, Oil Free – 7 oz
Alternatives: Clean & Clear Deep-Action Cream Cleanser 6.5 oz (184 g), Nivea Energizing Face Scrub for Men 4.4 oz.

In the shower, I use a water activated gel cleanser.

Neutrogena Body Wash for Clean, Clear Skin 8.5 fl oz (250 ml)
Alternatives: Dove Deep Moisture Body Wash, Two- 24 oz. Washes and One 8.45 fl oz Hand Wash and Pouf

Then a honey almond body scrub.

100 Percent Pure Organic Honey Almond Body Scrub (14 oz)
Alternative: Bellvita Honey / Almond Shower & Cream Bath and Shower Gel, 17 fluid ounces.

And on the face, an exfoliating gel scrub.

Nivea for Men Energizing Face Scrub, Normal Skin, 4.4 Ounces
Alternatives: Dove Gentle Exfoliating Foaming Facial Cleanser, 6.76-Ounce Tubes, Pond’s Fresh Start Daily Exfoliating Cleanser 6.7oz.

Then apply an herb mint facial mask, which I leave on for 10 minutes while I prepare the rest of my routine.

Queen Helene Mint Julep Masque 12oz. Jar

I always use an aftershave lotion with little or no alcohol, because alcohol dries your face out and makes you look older.

Nivea for Men Sensitive After Shave Extra Soothing Balm, 3.3 Fluid Ounces

Then moisturizer…

American Crew After Shave Moisturizer 4.23 oz.

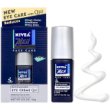
then an anti-aging eye balm…

Nivea Revitalizing Eye Cream Q10 0.5 oz.
Alternatives: Anthony Logistics Continuous Moisture Eye Cream (Anti-aging), Anthony Logistics for Men Eye Cream

followed by a final moisturizing protective lotion.

Nivea for Men Skin Essentials Protective Lotion, SPF 15, Normal to Dry Skin, 2.5 Fl Oz.
Alternatives: Gillette Complete SkinCare Protect Facial SPF 15 Moisturizer, 1.7 Ounce

There is an idea of a Patrick Bateman, some kind of abstraction, but there is no real me. Only an entity, something illusory. And though I can hide my cold gaze, and you can shake my hand and feel flesh gripping yours and maybe you can even sense our life styles are probably comparable, I simply am not there.

Vancouver Trip

Been a while since my last post, mainly because I have been bummed out as of late. My focus has shifted towards EVE Online, a space-based MMORPG that kicks ass. Anyway, I wanted to shed some light on my upcoming trip to Vancouver, British Columbia, which is this January 24th to the 28th. The flight cost me roughly 180.00$ for both ways, as I used my AeroPlan miles to pay for the trip. What I actually paid for was the airport and flight taxes. All in all, quite cheap, yes? The hotel of course is another 200-300$ (staying at a Best Western) along with a car rental (another 100$ for a Dodge Charger). The reason why I’m going to Vancouver is because a good friend of mine is getting engaged to his girlfriend that lives there. They met about 2 years ago and have been ‘dating’ since. I don’t know how some people manage long distance relationships, but alas, it’s not my cup of tea. Regardless, I wish them the best, and I look forward to the party. 🙂 Oh, I’ll also check out Whistler while I’m there and do some snowboarding.

This past holiday, I was mainly with family and friends. Since I’m Armenian, we celebrate our true Christmas on the 6th of January (which was two days ago). It consists of families getting together and eating a lot of good food. I must’ve gained quite a few pounds from this holiday season! New Years consisted of the same thing with the same people (just a different house). After the ball dropped, I went to my friends’ house at about 2:30 AM on New Years Day and had a few drinks with the guys. A decent New Years, but wasn’t as crazy as the time I went to the Bell Centre to check out some famous tech DJs.

Oh, I bought some Sennheiser PXC 250 Noise-Canceling headphones for trip to Vancouver. I will be writing a review about them when I get back.

New Media Center (HTPC) Computer

I always wanted to build myself a media center (HTPC) computer for my Sony Bravia 32″ LCD television but never got around to it. Well, that’s not entirely true, as I was trying to cut costs down and build a computer out of existing parts (a Celeron 2.4GHZ, 256MB of RAM, 20GB hard drive and basic on-board stereo sound). This setup was fine for Xvid playback over the network and I never had any surround-sound speakers until I finally found the deal of the century and picked up a LG LH-T9654MB “HTIB” from Futureshop for 230$ CDN taxes in (it was supposedly below the cost price). Since I got myself a simple surround setup, I enjoyed the audio more and more… playing movies in stereo sound was boring. What more, I was finding myself diving in 720p and 1080p content and Xvid just wasn’t cutting it. After trying everything I could to make 720p playback on the Celeron computer work smoothly (tried over-clocking, bumping up the RAM, etc) it simply did not work. I decided to get a new computer but I didn’t want to spend more than 500$ on the whole setup. I basically needed a CPU that could do 1080p playback, a motherboard that had an onboard SPDIF audio output connector and enough RAM to satisfy anything I can throw at it.

Doing a quick check on Google, I came across Tom’s Hardware Guide 2007 CPU charts for 1080p playback. Being an Intel fanboy, I found the right CPU for the right price: a Core 2 Duo E4600 CPU (2.4GHZ dual core with 2MB of cache, 800MHZ FSB). While not listed on the chart, it should be sufficient as the E4300 processes 1080p at 58.1% processor usage. Logically, this processor should do full HD processing at a lower usage rate. Since I sell computers, finding the CPU at cost price wasn’t that big of a deal, but the main problem was finding the motherboard and RAM at a low price. I mostly sell business computers, so finding those “enthusiast” hardware components at a cost is a challenge (not really difficult, but I was impatient to wait for everything to arrive). I decided to hit up NCIX and see what they could offer. I found the Asus P5K-VM motherboard that had everything I needed, except a TOSLINK connector (they had Coaxial audio only). For the RAM, I found the OCZ Platinum PC2-6400 2GB (4-4-4-15) dual channel memory kit. The memory was overkill but since it was on special and dirt cheap, I picked it up without thinking twice. Finally, while I was about to check out, I came across the Western Digital 500GB 16MB cache 7200 RPM SATA2 NCQ hard drive for 97$ (special of the week, couldn’t pass it up!). I added two of those babies for the media center computer as I knew I would be needed them for all the 720p/1080p content. Total of this order with taxes and shipping came up to 469.00$ CDN. Oh, there was a 35$ mail-in-rebate for the RAM, so this brings down the total to 434.00$.

After some billing issues (damn CIBC/VISA froze my account temporarily, more on that in another post) the parts came in and I quickly assembled the computer. I installed Windows XP Media Center Edition 2005 and setup Combined Community Codec Pack (CCCP) for the X264 playback. The results were superb: 720p and 1080p played back really, really well. No stuttering and the audio was perfectly in sync unlike the Celeron setup. Watching these high quality videos on the television was a treat and a half! The components I chose were definitely the right ones for the job; I was quite worried that the CPU wouldn’t be powerful enough to decode the streams, but thankfully, they surpassed my expectations. Only drawback/con of this setup: the Asus P5K-VM does not have an SPDIF optical output jack (but can be purchased separately, I hope). I’m using an Aureal Vortex 2 for the job right now, but there are no proper Windows XP drivers for it so the surround doesn’t really work. I’ll be fixing this very soon to get the proper audio setup.

Closing off, I’m happy with my purchase and look forward to filling up the hard drives with content. I hope this guide serves someone who’s looking into building a low-cost 1080p media center machine. All the components I have purchased in this guide were bought from NCIX, minus the case, power supply and CDROM drive (I had those laying around). Good luck!